Showing posts with label sewing machines. Show all posts

Friday, June 30, 2023

Friday Fun Fact: Sewing machine troubleshooting

It's never fun when your sewing machine acts up, but don't despair! There are specific steps to take to troubleshoot when your stitches go bad.

Crappy looking stitches are the most common problem we run into. Weird thread loops, big clogs, thread barf* - they all look icky and have no structural integrity.

Sounds like you need to adjust the tension, right? Not right away! Try these other steps first; if one doesn't work, keep on moving down the list in order.

1.) Rethread the machine. Many machines are touchy about proper threading. If your thread isn't in there just right, the stitches won't turn out.

Make sure the presser foot is UP while you thread! This enables the thread to engage in the tension discs like it should. Bring the presser foot down when you start to sew. It can also help to hold the threads down when you start.

2.) Rethread the bobbin. It has a tension spring, too, and needs to be threaded properly. You should feel some resistance. For drop-in bobbins, you should see the thread on top of the bobbin when it's threaded correctly, and most should spin counter-clockwise (but always check your manual).

3.) Change the needle. If it's old, bent, or just not right for your fabric, you might get bad stitches. Replace your needle after about every 10 hours of machine use. Yes, really that often!!**

4.) Try a different thread. We recommend either 100% poly or 100% cotton thread, of a good quality. Going cheap on crappy or old thread is going to be a huge time waster in the long run.

5.) Clean your machine. Lint build-up can affect the timing of your machine, which leads to crummy stitches.

6.) Adjust the tension. If you've done ALL the above steps, then try adjusting the tension dial. Tension mechanisms are delicate so go gently, turning no more than half a number at a time. 

If your stitches aren't fixed, you may need to get your machine serviced by a professional, but 9 times out of 10, these steps will get you sewing again in no time.

Keep this cheat sheet for later!

Check out all our Friday Fun Facts in the archive here!

* yes, that's the technical term

** this is only the time the machine is running. It doesn't count if you are ironing or taking a snack break.

Friday, June 2, 2023

Friday Fun Fact: Cover Stitch

A few weeks ago, we talked about sergers. Read that one here!

This week, we're exploring the cover stitch machine.

It can look like a serger, or a bit like a regular sewing machine, but a cover stitch machine is WAY more complicated.

Using cones and loopers, the cover stitch machine replicates the factory-made t-shirt hem with a double row of stitching on the right side.

Most home sewers who use a cover stitch machine agree: it doesn't replace a serger. Sure, it overlocks like a serger, but switching the settings from cover stitch to overlock stitch is complicated and requires some tricky threading. 

Instead, if you like what this machine can do, use it only for the cover stitch hem, and keep your basic serger for overlocking seams.

Friday, February 17, 2023

Friday Fun Fact: Threading your tension

Do you know how to properly thread your sewing machine's tension? Are you missing this vital step? If your stitches aren't right, the majority of the time it's a threading problem.

Let's look inside our machine's tension device. (This is the inside of my vintage Necchi machine, which has a casing that swings open on hinges for easy access, but not all machines have their tension device visible.)


We're looking at the tension dial, but look a little closer. Your machine's tension device is made of two metal discs that press together with a spring. The higher the number, the tighter they press together.


Your thread passes between the tension discs when you thread your machine, and it needs to be fully engaged and perfectly in place to work correctly.

The trick to perfect placement? RAISE the presser foot before your thread your machine!

When your presser foot is UP the tension discs separate, allowing you to get the thread in between just right! Our favorite trick is to hold the thread like dental floss to really bring it in correctly.

If your stitches look wonky, uneven, or just plain crummy, try re-threading your machine with the foot up, making sure the thread gets nestled right between those tension discs. You'll probably see an improvement!

Check out all our Friday Fun Facts in the archive here! 

Tuesday, December 17, 2019

On the seventh day of Christmas

My true love gave to me… A new sewing machine! And classes to make my sewing dreams come true! Yes, our Winter/Spring class schedule is now online.


Because you asked - more Beginning Apparel Sewing and Continuing On to encourage those new to sewing and those who already love it, new quilting classes with the always-creative Susan Stein, and all your favorites. Register now for that class you wanted that filled so soon last time.

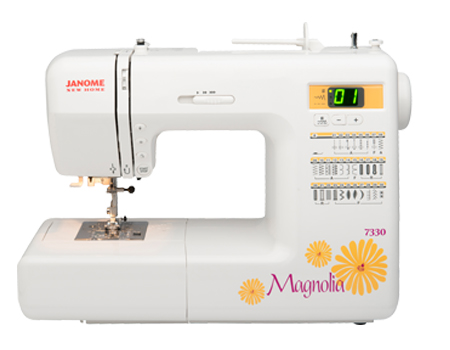
To support your sewing journey, Treadle is now offering 4 of our favorite Janome sewing machine models for sale.


From a solid mechanical machine to computerized with bells and whistles that practically sews it for you - choose the one that fits your favorite sewist’s dreams (even if your favorite sewist is you!) In cooperation with Valley West Sewing, we couldn’t be more excited to have sewing machines available.

Image result for janome magnolia


Can’t decide which class or machine is the perfect gift? A Treadle gift certificate comes in the perfect size for anyone on your list.